Frugal Foodie Mama: White Lights on Wednesday

Tuesday, September 17, 2013

Mini Applesauce Bundt Cakes

Pin It

Months ago my grandmother gave me her recipe for her traditional applesauce cake when I asked for it.  She didn't jot it down on a slip of paper.  She handed me a recipe card she had typed it out on (as in with a typewriter!) many years ago.  I have had it stuck to the side of my fridge tuck in among photos of my son when he was toddler and little notes & cards I have received from various family members and friends.  
Her applesauce cake in large bundt cake form has been a staple every single year at our family's annual Christmas Eve dinner & gathering.
I cannot leave my grandparents' home Christmas Eve until I have had at least one slice, and often she sends me home with a few more if there happens to be any left over at all.

When Julie from White Lights on Wednesday and Jen from Four Marrs... One Venus announced that this month's Get Your Chef On Challenge ingredient was applesauce, I knew it was time to take that recipe card off of the fridge.
I have been wanting to give my grandmother's traditional applesauce cake a little makeover (no pun intended since I did go with four mini bundt cakes and not one large bundt cake ;) ). 
My grandmother's cake is perfect the way that it is, don't get me wrong...
But when it calls for a entire box of brown sugar, a cup of Crisco... you get my drift.

So, I mini sized the cake and I lightened it up a little as well.
The results were lightly spiced, airy yet moist apple cakes studded with delicious walnuts.
My grandmother's cake is a little denser and super moist and studded with walnuts AND raisins...  I have never been a huge fan of raisins in anything, so for my version I opted to leave them out.  If you love raisins and want to toss in some, I would go with a 1/2 cup of them for this recipe.

Also, my grandmother's cake is plain, never frosted or glazed.  I figured since I was saving a few calories by leaving out the Crisco, it would be more than safe to add a little cream cheese frosting to the centers and down the sides of my Mini Applesauce Bundt Cakes. ;) I just used a store bought icing, but feel free to whip up a homemade version if you have a favorite.

Mini Applesauce Bundt Cakes

by Frugal Foodie Mama
Prep Time: 15 minutes
Cook Time: 30-35 minutes
Ingredients (4 mini bundt cakes)
  • 1 cup light brown sugar
  • 2/3 cup chopped walnuts
  • 1/4 tsp salt
  • 4 tbsp butter, softened
  • 1/4 cup plain Greek yogurt
  • 1 tsp cinnamon
  • 1/2 tsp nutmeg
  • 1 1/2 cups cinnamon applesauce (you could use plain as well- just up your ground cinnamon in the recipe by a 1/2 tsp)
  • 1 tsp baking soda
  • 1 cup whole wheat flour
  • 1 cup white flour
  • 1/2 cup store bought cream cheese frosting, or your favorite homemade cream cheese frosting (optional)
Instructions
Preheat your oven to 250 degrees.

In a large bowl, mix together the brown sugar, walnuts, salt, butter, Greek yogurt, and spices and set aside.

Pour the applesauce into a medium saucepan. Heat the applesauce until hot over medium heat. This should only take a few minutes. Remove the applesauce from the heat and quickly mix in the baking soda. The applesauce will double in size and become bubbly.
Pour this over top of the mixture in your bowl and stir.

Now add in both of the flours and stir until well combined.

Pour the batter evenly into your 4 mini bundt pans. I used silicone ones so there was no need to grease and flour them. If you are using regular mini bundt pans, be sure to grease and flour them so your cakes do not stick!
** You could also just make one large bundt cake instead of the 4 mini ones. Your bake time will increase to around an hour.

Bake the cakes for 10 minutes at 250 degrees and then increase the heat to 350 degrees for the remaining 20-25 minutes.
The cakes are done when a toothpick inserted in the middle comes out clean.
Allow to cool in pans for about 10 minutes, and then pop out on a wire rack to cool completely.
**Note- The bottoms of my cakes puffed out slightly, so I used a serrated knife to trim the rounded part so the cakes would stand flat. These pieces make a great little snack to taste test it while you are waiting for the cakes to cool! ;)

Optional- Once the cakes are cooled, place a dollop of cream cheese frosting in the center of each cake. I zapped the remaining frosting in the microwave for a few seconds and then drizzled it over the top and down the sides of each cake.
Enjoy!
Powered by Recipage

These mini bundt cakes are totally shareable.  In fact, one by itself was a bit much for me, and I shared the other half with my husband.  So, you could technically get 8 servings and not just 4 from this recipe. ;)


Pin It

Do you have a family heirloom recipe that you have given a "makeover" or that you would love to trim down the calories and fat a bit on?

This recipe was submitted as an entry in the...


Monday, September 16, 2013

White Lights On Wednesday is Turning Two! {A Giveaway!}


I am so excited to be joining Julie from White Lights on Wednesday in celebrating her blog's second birthday! :) In case you haven't met Julie before, she is one of the co-hosts of the Get Your Chef On Challenge (which I will be competing in this Tuesday).  I also pop over to her blog every other month as a cocktails contributor.  In fact, I was just over there this past Saturday sharing my recipe for a Basil & Garlic Bloody Mary- perfect for game days! :)

To celebrate two years of WLOW being a part of the blogging world, we are helping Julie give away a $150 gift card to Target, Etsy, or Amazon (your choice!) and 3 of Julie's favorite e-cookbooks...
  Use the Rafflecopter below to get entered and Good Luck! :)

a Rafflecopter giveaway

Tuesday, July 16, 2013

Blackberry Coconut Custard Cobbler

Juicy, sweet blackberries are baked into a creamy coconut custard filling in this Blackberry Coconut Custard Cobbler...
Juicy, sweet blackberries are baked into a creamy coconut custard filling in this Blackberry Coconut Custard Cobbler.

The taste of blackberries will always evoke summertime memories of my childhood.  Every summer, decked out in long sleeves and jeans, we would venture to these secret blackberry patch spots that my grandparents always seemed to know of.  After being briefed (yet again...) to watch out for thorns, snakes, and yellow jackets, we would all set out with buckets in hand to fill them with fresh, juicy wild blackberries.  Of course, several of the largest, sweetest berries would never make it in the bucket. ;)


We would bring the bounty home to be washed and then divvied out among the various families in attendance.  I couldn't wait for my mom start rolling out the dough for one of her homemade blackberry pies.  My mom had a talent with homemade pie crust.  They were always perfectly crimped and latticed.  
We would all eagerly wait for the pie to bake and then cool enough so that she could slice into it and serve it with a big scoop of vanilla ice cream.  Not that it really needed the ice cream, if you ask me.

Wednesday, July 10, 2013

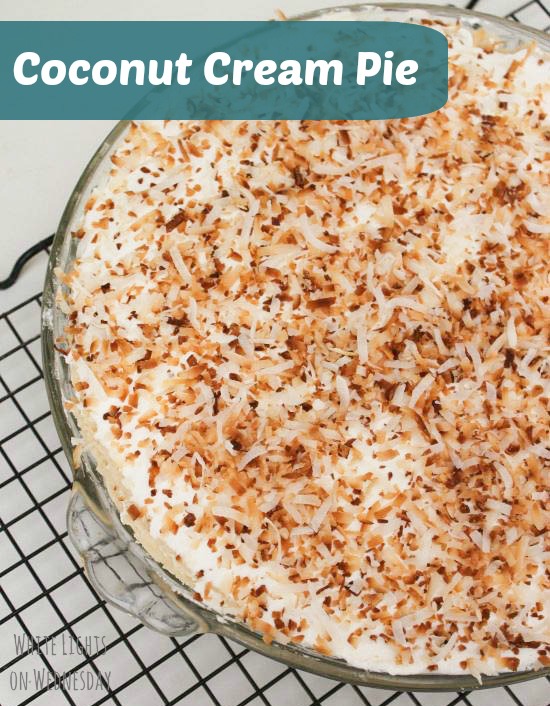
Coconut Cream Pie {A Guest Recipe from White Lights on Wednesdays}

Hey everyone. I'm Julie from White Lights on Wednesday. Back again to share another recipe with you - because Carrie and I just can't stay away from each other. :) She's kind of one of by blog girl crushes, just in case you didn't know Carrie. And in case you haven't heard, Carrie is going to be contributing for my blog starting this month. Be sure to stop by and see the fabulous cocktail recipes she's going to be sharing!

Pin It
For Carrie's Pies in July week, I couldn't resist sharing this creamy, dreamy Coconut Cream Pie. It's one of my favorite all time pies. Completely decadent and full of coconutty goodness - kind of like me. Sort of.

To get Julie's recipe for homemade Coconut Cream Pie, be sure to click on over to her blog to see her full recipe post today! :) While you are over there, make sure you wish her a Happy Birthday- it just may have been her birthday yesterday. ;)  
Thank you so much for sharing, Julie!  (I am not sure how she knew that coconut cream is one of my absolute favorite pies. )


In case you missed it yesterday...

And Don't forget to get yourself entered to win all the cute pie goodieness below in the Pies in July Giveaway!
giveaway
Pin It

You could win...
~All Over a $60 Value!~

*This giveaway is open to U.S. residents only.  All entries for the winner will be checked and verified, so please make sure you are doing what you are claiming in the Rafflecopter or all your entries will be voided.  No funny business, folks. ;). By entering you give the right to use your name and likeness. Number of entries received determines the odds of winning. One winner will be selected. This is a giveaway sponsored as a group buy, which means the bloggers pooled their money together to purchase these products for you.  Amazon & etsy are not sponsors of this giveaway.  The prizes in this package will be ordered by Carrie of Frugal Foodie Mama and sent directly from Amazon & Hummingbird's View to the winner.  Entries must come from your MAIN social media accounts, not accounts that have been set up separately just for entering giveaways.  Entries from these types of accounts will be disqualified.  Protected tweets do not count as an entry method for tweeting. Tweets must come from a public account. Bloggers in this group giveaway and their immediate family members in their household cannot enter or win the giveaway. No purchase necessary. Void where prohibited by law.
Please see the Rafflecopter widget below for additional Terms & Conditions.  Good luck, all! 

a Rafflecopter giveaway

Friday, March 29, 2013

Let Me Pintroduce You Party #3 {With a Bonus Bloglovin Link Up!}

Good morning everyone!!  Jaime from Mom's Test Kitchen and I are so happy to have you here for our third ever Let Me Pintroduce You Party! :)
Last month we had 83 Pinterest accounts linked up!  Can we reach over 100 for the month of March??


Jaime and I originally brainstormed the idea for a Pinterest linky party when the two of us were emailing back and forth one day after discovering how much of our blog traffic was a direct result of some of our recipe posts being pinned and then repinned and repinned again on Pinterest.  We thought why not host a monthly Pinterest party? And thus, Let Me Pintroduce You was born! 

And this month, we have decided to add a special Bloglovin linky seeing as how Google Reader just announced it's July 1st exit.  So after you have linked up your Pinterest accounts below, be sure to scroll down a bit and add your Bloglovin link as well! Just remember to give your hosts and co-hosts a follow. ;)

This month's party co-hosts are...


Julie from White Lights on Wednesday   &         Sarah from Fantastical Sharing of Recipes


                   White Lights on Wednesday               

Frugal Foodie Mama has just a few ad spots left for April!  I have one A Pin-t ad and two A Peck ads left.  Snag your spot for 20% off with promo code nofooling today or tomorrow only! :)  (Psssttt... the A Pin-t ad is a steal for exposure to my almost 5,000 Pinterest followers!)  To apply for your ad spot, just visit my Sponsor Page.


Today is the LAST DAY to enter the ~One Lucky Blogger Giveaway~!!  $70 in gift cards, 12 ad spots on 12 different blogs, & a custom photo watermark are all up for grabs to one very lucky blogger!  Be sure to get entered. :) 

And be sure to check out Julie's recipe for Cheesecake Sandwich Cookies & get entered to win a copy of the Tiny Food Party! Cookbook.


So, how does the Let Me Pintroduce You Party work?  Easy!
  • Please follow me (Frugal Foodie Mama) and Jaime (Mom's Test Kitchen), and this month's co-hosts Julie (Julie Espy {WLOW} and Sarah (Sarah E. {Fantastical Sharing}).
  • Try to follow at least two other Pinterest accounts that have linked up and maybe repin a few things that catch your eye while you are at. ;)
  • Grab our button above and slap it on your sidebar or your party page on your blog.  Help us spread the word! 
  • Be sure to link up your main Boards page of your Pinterest account only, not individual board pages or individual pins.
  • Then hop down to the Bloglovin linky & do the same! 
  • Send out a tweet & let the Twitterverse know that we would like to Pintroduce them to everyone! (Just use that handy little Tweet button below. ;) )

Link up your Pinterest accounts here...


And link up your Bloglovin pages here...


Wednesday, March 27, 2013

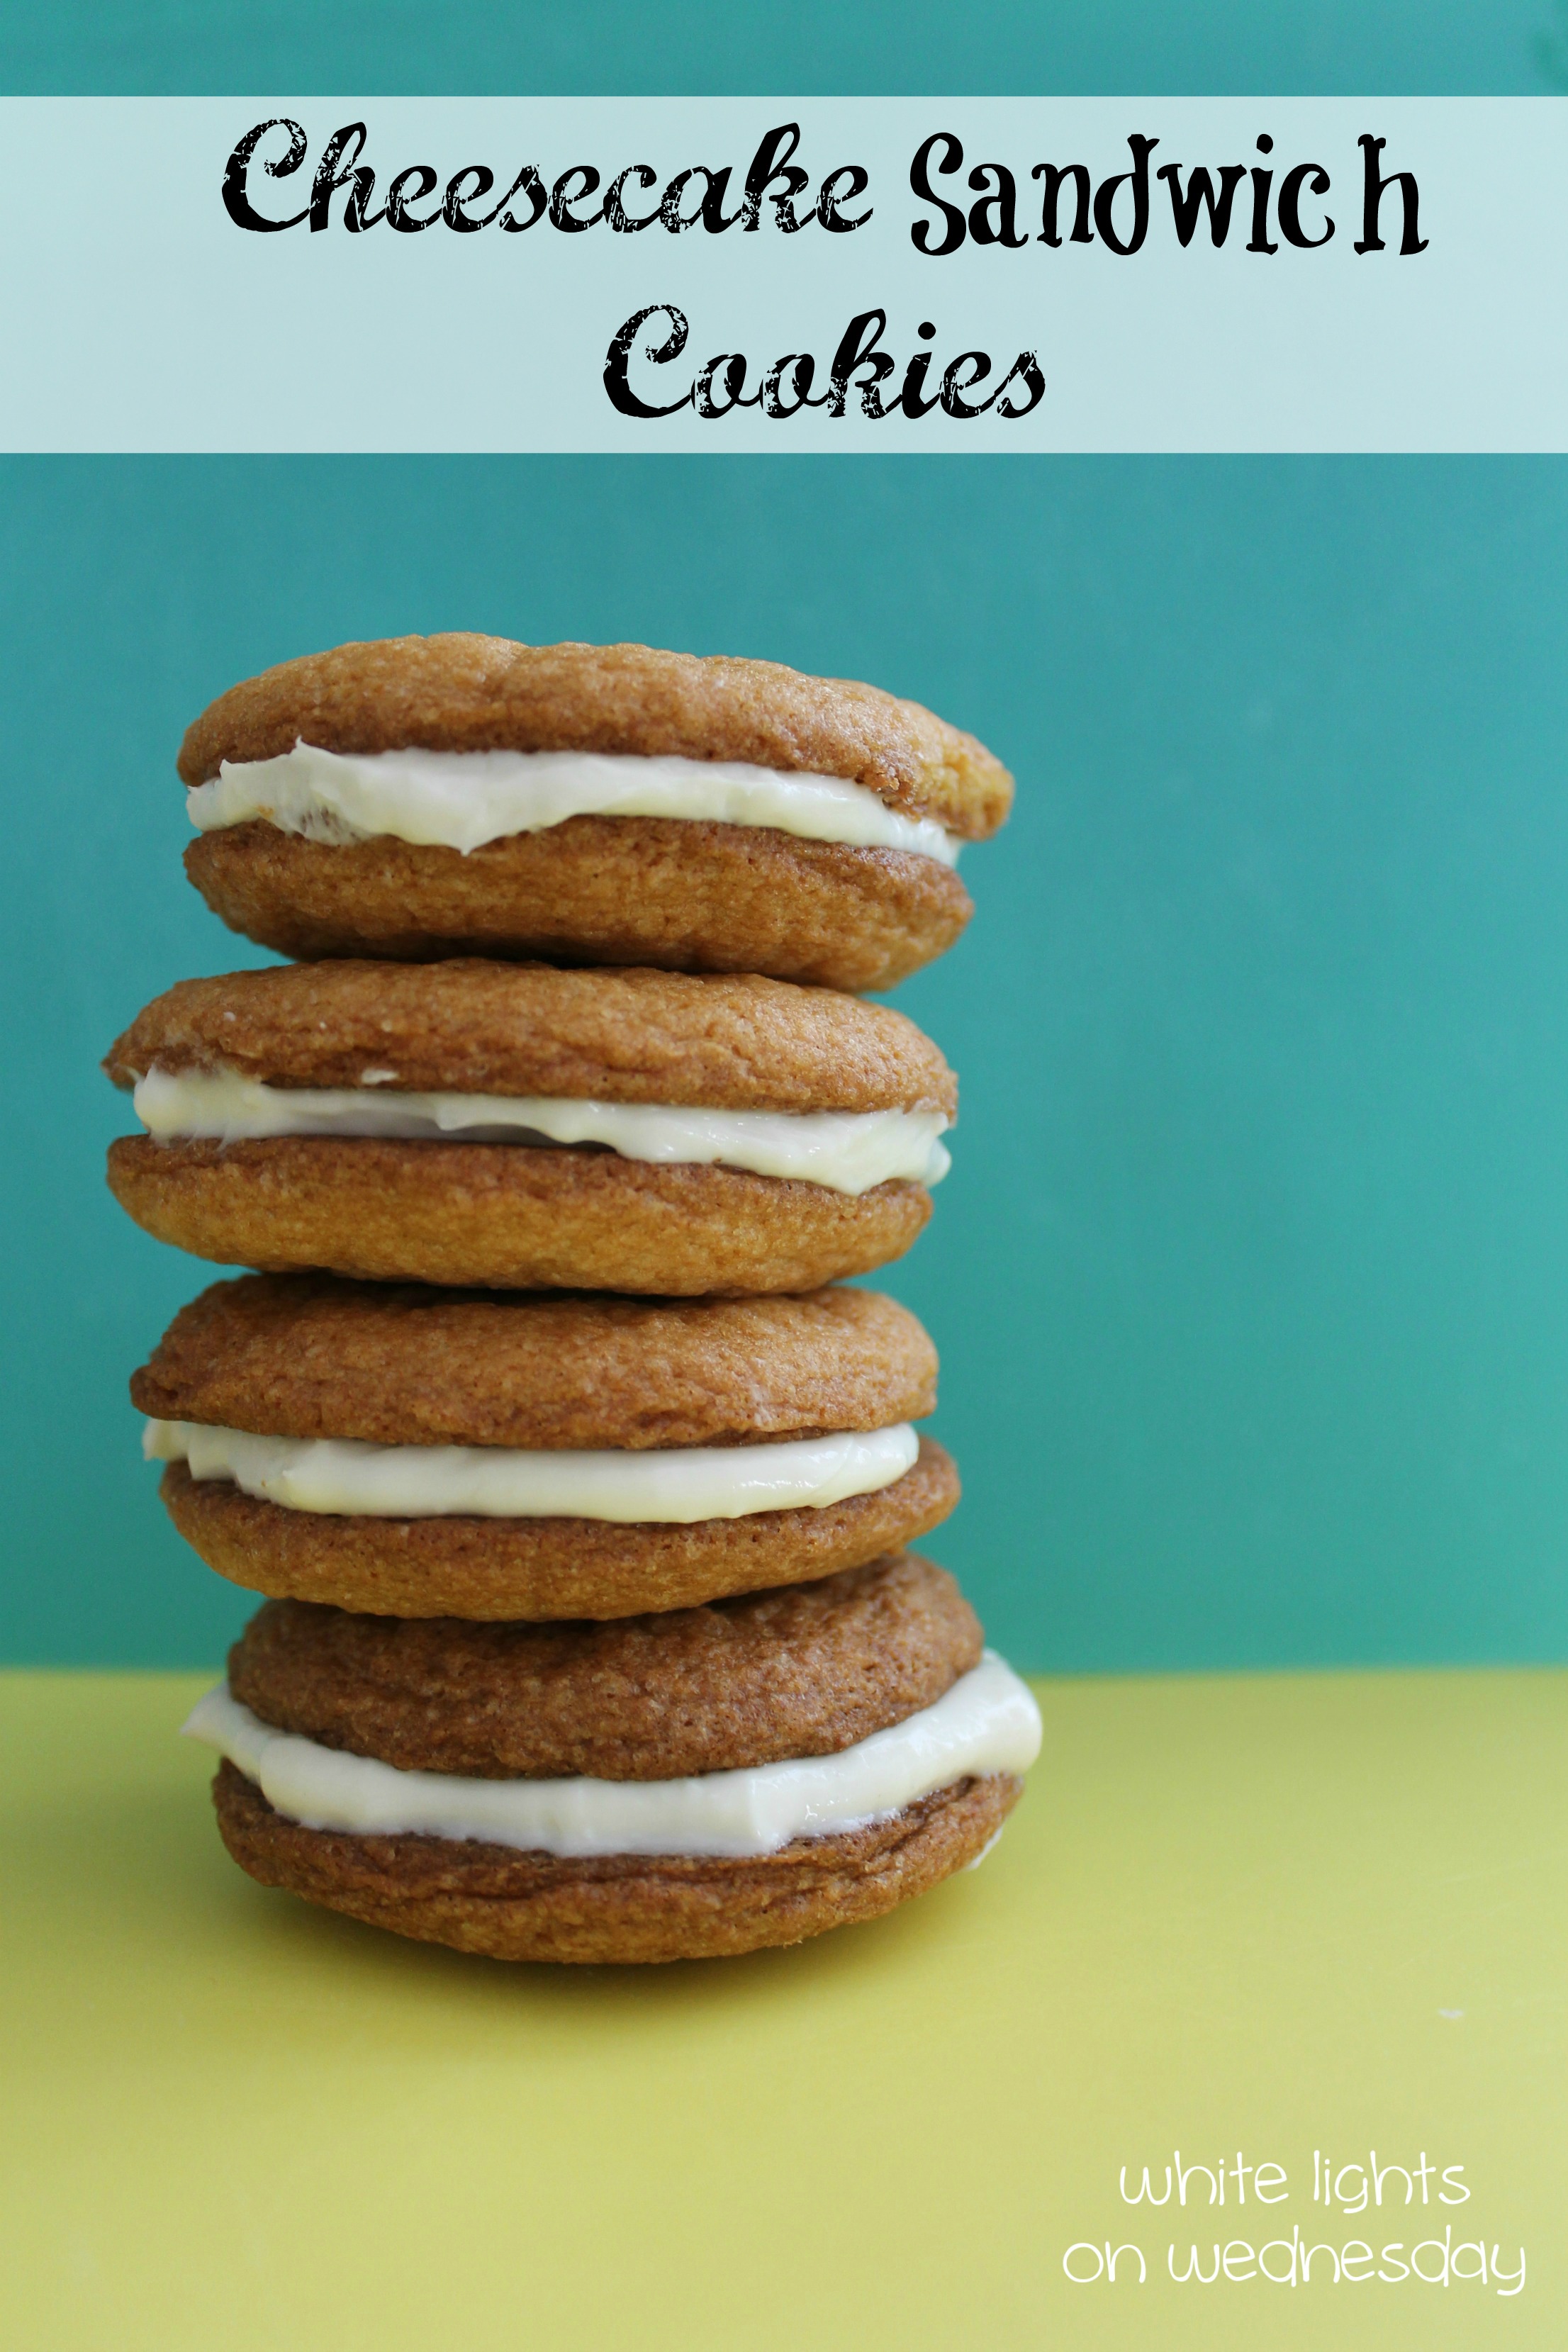
Cheesecake Sandwich Cookies {A Guest Recipe from White Lights on Wednesday & a Giveaway!}

Hi there. I'm Julie from White Lights on Wednesday.
Julie
I live in Arizona with my boyfriend and our two little boys. Yes, it's stupid hot in the summertime. I love food - making it, sharing it, EATING it! I like Guinness, whiskey, and tattoos. I hate mushrooms, and you can almost always buy me off with a chocolate dipped cone from Dairy Queen. Some of my reader's favorite posts include Chicken Cordon Bleu, Swedish Meatballs, and Creamed Corn - like the best creamed corn ever.   I'm really happy to be posting on Carrie's blog today. I'm just think she's the bee's knees and she's seriously such an amazing person. These cookies are an original recipe I put together after getting an invite to do an online recipe contest. But the rules said I couldn't use a recipe I'd already posted about, and I could never post the recipe to my blog. Ummm...no. The wheels were already turning, and these Cheesecake Sandwich Cookies were born. They are amazing! The cookies are a little soft right out of the over, but they get a chewy firm texture as they cool that totally holds up to the filling. I hope you love them as much as we do.
Cheesecake Sandwich Cookies 3.5
Cheesecake Sandwich Cookies
Makes 36 cookie sandwiches
Ingredients:
Cookies:
2 cups unsalted butter, at room temperature
3 cups cups sugar
4 eggs
1/2 cup milk
2 tablespoons vanilla extract
2 small packages Cook & Serve Jell-O Butterscotch Pudding
6 cups flour
2 teaspoons baking soda
1/2 teaspoon baking powder
1 teaspoon salt
Cheesecake Filling:
2 - 8 ounce packages cream cheese, at room temp
1/4 cup light corn syrup
1/2 cup sugar
1 teaspoon vanilla extract
2 - 5.3 ounce cups plain Greek yogurt
Directions:
Cookies
  1. In a medium mixing bowl, combine flour, cocoa mix, baking soda, baking powder, and salt; set aside.
  2. In a large mixing bowl beat together butter and sugar on medium speed. Add eggs, milk, and vanilla; beat until fully incorporated. Mix in dry ingredients, in two additions, until just moistened.
  3. Preheat oven to 350 degrees F. While oven heats, place cookie dough in the refrigerator. Th dough will be tacky when it's finished, chilled the dough makes it easier to roll. Keep the dough in the fridge in between baking to help keep it easy to roll.
  4. Scoop out cookie dough by the tablespoon and roll into a ball. Bake for 10 to 12 minutes, until edges just being to brown. Leave cookies on pan for one minute then transfer to a wire rack to cool completely.
Filling
  1. In a large mixing bowl, beat cream cheese until smooth on medium-high speed.
  2. Add corn syrup, sugar, and vanilla. Beat until combined. Add Greek yogurt and beat until smooth.
Assembly
  1. Pair up your cookies so they are about the same size as their partner. Using an offset spatula (or regular spatula) place about 2 tablespoons of filling on the bottom of one cookie. Spread the filling over the cookie, all the way to the edges. Top with second cookie (bottom side touching the filling) and squeeze a little to secure everything.
  2. Place finished sandwich cookies on a baking sheet. Refrigerate cookies for at least 1 hour before serving so the filling can fully set.

And now Julie wants to give one of you a copy of Tiny Food Party!: Bite-Sized Recipes for Miniature Meals from one her favorite blogs, Spoon Fork Bacon.  
Just enter using the Rafflecopter below! :)


*This giveaway is open internationally.  If the winner does not live within the U.S., Julie will provide that winner with an Amazon gift card for the price of the cookbook in lieu of the actual cookbook.  All entries for the winner will be checked and verified, so please make sure you are doing what you are claiming in the Rafflecopter or all your entries will be voided.  No funny business, folks. ;). By entering you give the right to use your name and likeness. Number of entries received determines the odds of winning. One winner will be selected. Frugal Foodie Mama is not responsible for the delivery of the above stated prize. Protected tweets do not count as an entry method for tweeting. Tweets must come from a public account. No purchase necessary. Void where prohibited by law.
Please see the Rafflecopter widget below for additional Terms & Conditions.  Good luck, all! 

a Rafflecopter giveaway