Frugal Foodie Mama: Search results for cookie baking

Saturday, November 1, 2014

15 Fabulous Make-Ahead Holiday Cookies

Get a head start on all that holiday baking now with these 15 Fabulous Make-Ahead Holiday Cookies recipes...


15 Fabulous Make-Ahead Holiday Cookies via thefrugalfoodiemama.com - the cookie dough and/or finished cookies for these recipes freeze beautifully for the holidays


This post may contain affiliate links. Purchasing through them helps support this website.


Now that all of that Halloween business is behind us for another year, it is time to focus on that most wonderful time of the year...the holiday season!


If you are like me, the holidays are jam-packed full of family gatherings, last-minute gift shopping, home decorating, and of course, cookie baking.


But just what if you could get that holiday cookie baking done and out of the way?
Like now? ;)
Before the hustle and the bustle sets in.


Yes, folks. Freezer-friendly cookie dough and perfectly baked cookies could be all nestled in your freezer just ready for you to defrost and serve and enjoy. Have cookie dough and tasty cookies at the ready for unexpected holiday guests or impromptu baking sessions with the kiddos or your girlfriends.


Friday, June 12, 2015

Cookie Dough S'mores Bar

Change up those usual s'mores and offer your guests a fun and fuss-free Cookie Dough S'mores Bar instead- 3 edible, egg-free cookie dough spreads & a fun cookie baking inspired display... 

Change up those usual s'mores and offer your guests a fun and fuss-free Cookie Dough S'mores Bar instead- 3 edible, egg-free cookie dough spreads & a fun cookie baking inspired display. #LetsMakeSmores #ad
This shop has been compensated by Collective Bias, Inc. and its advertiser. All opinions are mine alone.


As soon as the warmer weather settles in and summer makes it's presence known, our side deck and fire pit become the go-to spot for planned and impromptu summer get-togethers with family and friends on the weekends. Those fun summer evenings usually begin with a little barbecuing and multiple games of corn hole, and they almost always end with all of us gathered around the fire pit roasting marshmallows and making s'mores. :) 

While we are all happy with some good ole fashioned s'mores, every once in a while I like to change things up and fancy up our s'mores parties a little bit. For our most recent weekend get-together, I had an idea for a cookie dough s'mores bar that I had just had to put into action.

But before we host any summer party, I always have to swing by our local Walmart to stock up on our favorite s'mores making supplies...

Thursday, May 2, 2013

Cookie Butter Pecan Bars {The Leftovers Club}

Pin It

I will admit it.  I am a full-on cookie butter addict.  I spread it on granola bars, dip pretzels in it, and just eat it by the spoonful straight out of the jar.  I knew it wouldn't be long before I was baking with it.  

The inspiration for my Butter Pecan Cookie Butter Bars came to me when I was visiting the Wine and Glue blog and came across Lisa's recipe for Sugar Cookie Cookie Butter Bars.  I am not going to lie- I REALLY wanted to make her cookie bar recipe, but I was feeling lazy and was short on butter for her recipe.  So, I improvised! ;)

I had a box of Butter Pecan cake mix that had been sitting in my pantry for a few months now.  Honestly, I had no clue why I even bought it.  But it had been sitting there on my shelf for months staring at me, begging me to just do something with it.  I figured cookie butter and butter pecan would go well together, so why not make some cookie bars combining the two flavors? (And finally get rid of that box of cake mix already! ;) )

And so I did and the results were ah-mazing!  In fact when I was paired up with my April partner for The Leftovers Club, I knew I had to make a batch of these cookie bars again to send to Daphne of Go Gastronomy.

What you will need:
1 box of butter pecan cake mix
1/2 cup butter, melted
1 egg
1/2 cup chopped pecans (optional- I did not add pecans to either one of my batches of the cookie bars, but I plan to for my next batch.)

For the cookie butter layer:
1 stick of butter
1 cup of cookie butter
3/4 cup powdered sugar

Preheat your oven to 350 degrees.  Spray a 8 x 11.5 baking pan with cooking spray.  Set aside.

Dump the cake mix into a large mixing bowl.  In your microwave, melt the 1/2 cup butter in a microwave safe bowl.  Pour the melted butter over the cake mix and add the egg.  Mix well.  Fold in the chopped pecans if you decided to add them.  

Press the butter pecan dough into the bottom of the prepared baking pan.  Bake at 350 for 20-25 minutes, until the cookie layer is lightly golden brown.  

Let it cool completely (pop it in the fridge for 30 minutes to speed up the process if you are impatient like me).  

Once the cookie layer is cooled, whip up the cookie butter layer.  Place the stick of butter in a medium sized microwave safe bowl.  Nuke it for about 30 seconds.  Add the cookie butter and microwave for another 30 seconds.  Whisk in the powdered sugar until smooth.  
Spread the cookie butter mixture evenly over top of the cooled butter pecan cookie layer.

Pop in the refrigerator for at least 30 minutes until the cookie butter layer sets up. 

I cut the cookie bars as needed, and left the entire pan wrapped tightly with plastic wrap at room temperature.  You can refrigerate them if you would like, but be sure to let them come to room temperature before cutting or the cookie butter layer will break up.

I am not going to lie...  I probably ate 80% of both of the batches of these Cookie Butter Pecan Bars that I made.  They are addicting.  And they were staring me in the face.
All day.
Every day.
Just sitting out on that kitchen counter beckoning me to cut off just one more tiny piece.
Note:  All those tiny pieces add up to one huge hunk by the end of the day.... just saying. ;)
So I was more than happy to send a few bars Daphne's way for this month's The Leftovers Club swap. 

Pin It

Cookie Butter Pecan Bars

by Frugal Foodie Mama
Prep Time: 10 minutes
Cook Time: 20-25 minutes
Ingredients (12-16 bars)
    For the cookie bar layer
    • 1 box of butter pecan cake mix
    • 1/2 cup butter, melted
    • 1 egg
    • 1/2 cup chopped pecans (optional)
    For the cookie butter layer
    • 1 stick of butter
    • 1 cup of cookie butter
    • 3/4 cup powdered sugar
    Instructions
    Preheat your oven to 350 degrees. Spray a 8 x 11.5 baking pan with cooking spray. Set aside.
    Dump the cake mix into a large mixing bowl. In your microwave, melt the 1/2 cup butter in a microwave safe bowl. Pour the melted butter over the cake mix and add the egg. Mix well. Fold in the chopped pecans if you decided to add them.
    Press the butter pecan dough into the bottom of the prepared baking pan. Bake at 350 for 20-25 minutes, until the cookie layer is lightly golden brown.
    Let it cool completely (pop it in the fridge for 30 minutes to speed up the process if you are impatient like me).
    Once the cookie layer is cooled, whip up the cookie butter layer. Place the stick of butter in a medium sized microwave safe bowl. Nuke it for about 30 seconds. Add the cookie butter and microwave for another 30 seconds. Whisk in the powdered sugar until smooth.
    Spread the cookie butter mixture evenly over top of the cooled butter pecan cookie layer.
    Pop in the refrigerator for at least 30 minutes until the cookie butter layer sets up.
    I cut the cookie bars as needed, and left the entire pan wrapped tightly with plastic wrap at room temperature. You can refrigerate them if you would like, but be sure to let them come to room temperature before cutting or the cookie butter layer will break up.
    Powered by Recipage

    If you are a lover of cookie butter like me, make sure to check out my recipe for...
    Cookie Butter Walnut Granola

    Be sure to check out all the other amazing recipes from this month's The Leftovers Club...

    Savory Simple - Quinoa Energy Bars
    The Girl In The Little Red Kitchen - Cashew Butter and Blackerry Jam Thumbprint Cookies
    Dining with Dani - Pancakes and Bacon Cookies
    Eats Well With Others - Salted Caramel Shortbread
    Frugal Foodie Mama - Cookie Butter Pecan Bars
    Let's Give Peas a Chance - Chocolate Stout Brownies
    Budget Gourmet Mom - Crisp Oatmeal Cookie Sandwiches
    Sugar Dish Me - Strawberry Lemonade Loaf
    Roxana's Home Baking  - Chocolate chip bars
    O'Boy! Organic - Rhubarb Cake
    Eat Bake Drink Cook - Everything Cookies
    Healthy. Delicious. - Carrot Cake Granola
    Souffle Bombay - Sweet & Spicy Pecans
    The Spiced Life - Garam Masala Caramel Corn
    Whey Beyond the Naked Truth - Chia Seed Protein Bites
    Don't you wish you could enjoy some of these leftovers with us? You can!  Visit The Leftovers Club online for more details!

    Wednesday, February 17, 2016

    Bakery Style Cookie Butter M&M's Cookies

    Chock full of M&M's & cookie butter, these thick & soft Bakery Style Cookie Butter M&M's Cookies are so easy to make at home...

    Chock full of M&M's & cookie butter, these thick & soft Bakery Style Cookie Butter M&M's Cookies are so easy to make at home.


    One thing that I am sucker for is a big, soft, and thick bakery style cookie. One thing that I am not a sucker for is the bakery style prices most places charge. I mean, you can easily pay $2-$5 per cookie! I decided to remedy this little dilemma by coming up with a bakery style cookie recipe that I could make at home for a fraction of the cost that I would pay at a specialty bakery. ;)

    It is really no big secret that I am fan of all the cookie butter things. (My Cookie Butter Pecan Fudge, Biscoff Gingersnap Brownies, and Homemade Biscoff Flavored Coffee Creamer are all cases in point.) So, I packed these palm-sized cookies full of cookie butter spread and for good measure, lots of M&M's candies. :) 

    Wednesday, June 12, 2013

    Cookie Butter Surprises {A Guest Recipe from A Peek Into My Paradise}

    Cookie Butter Week is continuing on the blog with this delicious guest recipe from Cathy of A Peek Into My Paradise.  I seriously need a dozen or so of these cookies for myself. ;) In case you missed the first two posts in Cookie Butter Week, be sure to check out my recipe for Cookie Butter Caramel Biscotti and yesterday's round-up post of Nine Reasons to Eat Cookie Butter For Breakfast.  

    Hi Frugal Foodie Mama readers! I am Cathy from A Peek Into My ParadiseI am so thrilled to be guest posting for Carrie today and a big thank you to her for having me! Over at my blog you will find a little bit of everything - from crafts, scrapbooking and DIY to recipes, travel and Disney...I even throw in random peeks into my paradise. 

    I have been making Santa Snickers Surprises with peanut butter during the Christmas holiday season for years; and they are one of my families favorites! Cookie butter is a fairly new ingredient to me. I have read rave reviews declaring how life changing cookie butter is! I thought, "how have I been baking for over 40 years and never tried cookie butter?!" I baked up a batch of altered Santa Snickers Surprises with cookie butter and they were a HUGE hit at my son's birthday party! We now have a new favorite; Cookie Butter Surprises!

    I was excited when I heard Carrie was hosting a Cookie Butter week! I am very honored she chose my recipe to feature today! If you haven't tried cookie butter yet, I highly suggest you do! In the very near future, over at A Peek Into My Paradise, I will be posting a cookie butter smoothie recipe that is to die for! Let's get to today's recipe.....

    A miniature snickers bar surrounded by a cookie butter cookie 

    Pin It


    I heard Trader Joe's has the BEST cookie butter; unfortunately we don't have a Trader Joe's in the city I live in. I found Lotus Biscoff Spread at Walmart, and also at Target and Winco. 


    Cookie Butter surprises takes one cup of cookie butter;
    which turned out to be the entire 13 ounce jar.


    Combine 2 sticks of softened butter, 1 cup of cookie butter, 1 cup of brown sugar and 
    1 cup of granulated sugar using a mixer on medium speed until light and fluffy.

    If you love cookie dough it will take a lot of will power to 
    resist scooping up a big spoon of this batter!


    Add 2 eggs and 1 teaspoon of vanilla extract until thoroughly combined. 


    In a medium sized bowl combine 3 1/2 cups of all purpose flour, 
    1 teaspoon baking soda and 1/2 teaspoon of salt. Then slowly add the 
    flour mixture to the butter dough with the mixer on low. 

    Unwrap all the Snickers miniature bars. 


    Scoop a tablespoon or cookie scoop size of dough and flatten into your hand.
    Place a Snickers miniature bar in the center of each piece of dough.
    Form the dough into a ball around each Snickers miniature. 


    Place on a greased cookie sheet, parchment paper or silicone baking sheet.
    I have three silicone baking sheets which makes it easy to bake multiple batches of 
    cookies. I slip the batch removed from the oven off the stoneware baking sheet to
    cool and load up another silicone sheet for baking.


    Let cookies cook on the silicone sheet if using multiple,
    wax paper or cooling rack.


    I often make the dough, roll it into balls, place them on a wax paper
    covered cookie sheet and freeze for 3-4 hours. Remove them from the 
    freezer and pop the frozen balls into a freezer ziploc bag. These are perfect 
    for a quick dessert and for my husband and I an easy way to have a 
    few warm cookies for dessert without having to bake an entire batch! 

    Pin It

    Carrie, thank you again for having me! I can't wait to see the other cookie butter recipes on your blog this week!

    I hope you take A Peek Into My Paradise and when you do, leave me a note in the comment box; I love to make new friends! Have a terrific week!


    Monday, June 10, 2013

    Cookie Butter Caramel Biscotti {Welcome to Cookie Butter Week!}

    Pin It

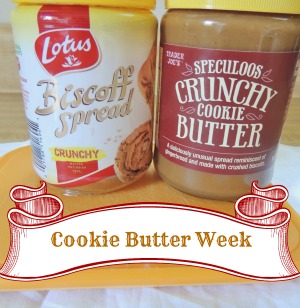
    I am crazy excited about Cookie Butter Week happening on the blog this week!  (Like, REALLY excited!)  Some may say that I have a mild obsession with cookie butter.  Others may say I am downright addicted.  I would have to admit that I am definitely guilty of both. ;)  This week is going to be filled with TONS of tasty, drool worthy, and creative recipes using Cookie Butter or Biscoff Spread....
    I am often asked just what is cookie butter?  
    Here is the best way I can explain it- it has the consistency of a nut butter, but instead of peanuts or almonds it uses cookies and spices like cinnamon and nutmeg.  The taste of cookie butter is reminiscent of gingerbread or graham crackers.  

    The next question I often get is where can you find cookie butter?  Trader Joe's carries a smooth and a crunchy variety in their stores.  I have also spotted the Biscoff brand of the spread at my local Walmart and most recently at my local ALDI store (the Biscoff was about 20 cents cheaper at ALDI than at Walmart- **UPDATE- I say the Biscoff spread on sale at my local ALDI for just $2.49 a jar yesterday!!  Yes, I stocked up. ;) ).  
    Okay, next question is usually which brand do I prefer?  Honestly, I am a little partial to the Biscoff spread and I like the crunchy variety over the creamy one.  But I have used both in my recipes that you will find on the blog throughout the week.

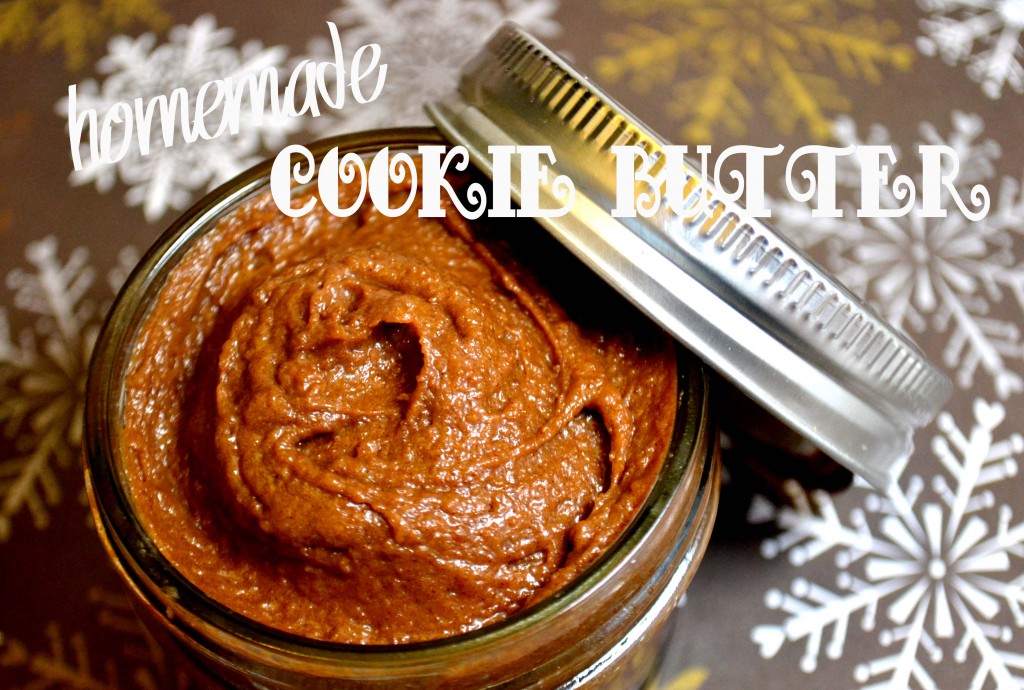
    So what can you do if you have looked EVERYWHERE and still can't find a jar of cookie butter to take home?  Well, how about make your own? ;)  There is a fabulously easy recipe on the Pink Cake Plate for Homemade Cookie Butter...

    Okay, now that you have the lowdown on exactly what cookie butter is and where you can find it for yourself, let's go onto the first cookie butter inspired recipe of the week... my Cookie Butter Caramel Biscotti!

    What you will need:

    1/3 cup cookie butter
    1/3 cup prepared caramel sauce
    2 eggs
    1/2 cup brown sugar
    2 cups flour
    1/2 tsp baking powder
    1/2 tsp salt
    1/2 tsp cinnamon
    1/2 cup walnuts, chopped (optional- but chopped pecans would work really well with the flavors in this biscotti as well)
    1 egg white + 1 tbsp milk + turbinado sugar (I found this at Trader Joe's, but you can use any larger crystal sugar for this- even colored ones if you want to be fun with this! ;) )

    Preheat your oven to 350 degrees.  Line a baking sheet with a silicone baking mat or parchment paper.  Set aside.

    In a large bowl, beat together the cookie butter, caramel, eggs, and brown sugar until nice and creamy and light in color.  Set aside.
    In a medium bowl, whisk together the flour, baking powder, salt, and cinnamon.  Gradually beat the flour mixture into your wet mixture.


    If you are opting to add chopped walnuts or pecans to your biscotti, fold those in now.  

    Transfer the dough to your lined baking sheet and form into a flat loaf, about 15 inches long & 5-6 inches wide.  Bake for 25 minutes, and then remove from the oven.  Turn the heat down to 325.  
    Allow the loaf to cool for about 5-10 minutes.  I like to lightly pat down the loaf with water after it has cooled for about 5 minutes to prevent the loaf from cracking.

    Once the loaf has cooled a bit but is still warm, cut into about 1 inch thick slices using a chef's knife.  I know that most people tend to use a serrated knife when cutting biscotti, but I ALWAYS find that my slices rip and crumble when I use one.  I switched to cutting them with a chef's knife and never had that problem again. :)
    You can cut your slices on a diagonal, if you wish.  I usually just cut them straight across.

    Place the cut biscotti back on the lined baking sheet flat side down.  Whisk together the egg white and milk.  Brush each biscotti (just on one side!) with the egg mixture and then sprinkle with the turbinado sugar.  This will ensure that the sugar sticks and gives your biscotti a nice sparkle when baked. :)

    Bake an additional 20-25 minutes.
    Transfer the baked slices to a wire rack and allow them to cool completely.
    You can store the biscotti in an airtight container for up to one month.  (They probably won't last that long though... ;) )

    I loved how this biscotti turned out.  It was sweet and crunchy with just a hint of cookie butter and caramel flavor.  It would pair perfectly with your morning coffee or a hot cup of tea.

    Pin It

    I hope this recipe has you all excited for the what is to come the rest of the week! :) Make sure you stop back by tomorrow morning for my first cookie butter recipe round-up post of the week....

    Love baking your own biscotti home too?  Make sure you check out my recipe for...
    Coconut Chai Biscotti

    Cookie Butter Caramel Biscotti

    by Frugal Foodie Mama
    Prep Time: 10 minutes
    Cook Time: 50-60 minutes
    Ingredients (10-12 biscotti)
    • 1/3 cup cookie butter
    • 1/3 cup prepared caramel sauce
    • 2 eggs
    • 1/2 cup brown sugar
    • 2 cups flour
    • 1/2 tsp baking powder
    • 1/2 tsp salt
    • 1/2 tsp cinnamon
    • 1/2 cup walnuts, chopped (optional- but chopped pecans would work really well with the flavors in this biscotti as well)
    • 1 egg white + 1 tbsp milk + turbinado sugar (I found this at Trader Joe's, but you can use any larger crystal sugar for this- even colored ones if you want to be fun with this! ;) )
    Instructions
    Preheat your oven to 350 degrees. Line a baking sheet with a silicone baking mat or parchment paper. Set aside.
    In a large bowl, beat together the cookie butter, caramel, eggs, and brown sugar until nice and creamy and light in color. Set aside.
    In a medium bowl, whisk together the flour, baking powder, salt, and cinnamon. Gradually beat the flour mixture into your wet mixture.
    If you are opting to add chopped walnuts or pecans to your biscotti, fold those in now.
    Transfer the dough to your lined baking sheet and form into a flat loaf, about 15 inches long & 5-6 inches wide. Bake for 25 minutes, and then remove from the oven. Turn the heat down to 325.
    Allow the loaf to cool for about 5-10 minutes. I like to lightly pat down the loaf with water after it has cooled for about 5 minutes to prevent the loaf from cracking.
    Once the loaf has cooled a bit but is still warm, cut into about 1 inch thick slices using a chef's knife. I know that most people tend to use a serrated knife when cutting biscotti, but I ALWAYS find that my slices rip and crumble when I use one. I switched to cutting them with a chef's knife and never had that problem again. :)
    You can cut your slices on a diagonal, if you wish. I usually just cut them straight across.
    Place the cut biscotti back on the lined baking sheet flat side down. Whisk together the egg white and milk. Brush each biscotti (just on one side!) with the egg mixture and then sprinkle with the turbinado sugar. This will ensure that the sugar sticks and gives your biscotti a nice sparkle when baked. :)
    Bake an additional 20-25 minutes.
    Transfer the baked slices to a wire rack and allow them to cool completely.
    You can store the biscotti in an airtight container for up to one month. (They probably won't last that long though... ;) )
    Powered by Recipage

    Thursday, December 13, 2012

    Christmas Cookie Swap ~ Thumbprint Twists


    I have to tell you all... I had a blast being one of the co-hosts for the Christmas Cookie Swap.  I was super lucky that one of my swap partners was Jaime from Mom's Test Kitchen.  Jaime sent me her recipe for Thumbprint Twists.  It seemed pretty straight forward- just 4 ingredients.  Should have been easy, peasy, right?  Well.... almost. ;)

    Jaime's Thumbprint Twists
    What you will need:
    1 package sugar cookie mix
    1/2 cup butter, softened
    1 egg
    1 bag of Hershey's Kisses Hugs (don't worry- you won't use the entire bag for the cookies)

    Preheat the oven to 350 degrees.  Grease a mini-muffin pan.

    In a medium bowl, mix together the cookie mix, butter, and egg.  

    Scoop the cookie dough into the mini muffin pan, filling about 3/4 of the way full.

    Bake 7-10 minutes until the edges are starting to get golden and the middle of the cookies are barely done.

    While the cookies are baking, unwrap your Hershey's kisses.  You need 1 per cookie.

    Once the cookies have finished baking, immediately push the Hugs into the center of the cookies.  
    Let the cookies cool for 2 minutes in the pan and then remove to a wire rack to cool completely.  It's easiest to use a spoon to scoop the cookies out of the pan.

    Okay, so I deviated from the recipe.  You all know I had to add my own little twists to it.  I first started by dividing the cookie dough into 3 bowls.  Using food coloring, I colored one bowl green and one bowl red.  I left the other bowl of dough plain.

    Then I decided to roll half the cookie dough into balls and then roll those into holiday colored sprinkles.  I placed the cookie dough balls onto a cookie sheet and baked for about 8 minutes.  (If you scroll to the last photo in this post, you can see how those turned out.  Pretty, huh? ;) )
    I decided to stick with the good ole Hershey Hugs, but you could opt for any of the new and fun holiday flavored Kisses.  

    For the second batch, I decided to try the mini muffin pan.  I didn't like how flat the first batch turned out.  I was hoping the cookies would hold the ball shape a little better.  I pressed the remaining dough into the muffin pan and then topped some of them with the holiday sprinkles.  I baked them for about 10-11 minutes.  And this is where the whole cookie baking deal took a humorous turn...

    This is what happened ^^^ to my second batch.  I couldn't bake them any longer or the tops and edges would have been burnt, but they were pretty doughy in the middle and at the bottom.  Not that this didn't taste amazing, especially warm.  It just wasn't very pretty. ;)
    Annnndddd.... here was the issue...
    Yep.  HUGE baking fail.  I never turned my oven from Preheat to Bake.  Thus, why I had the  weird uneven baking.  Too bad I didn't realize it until I was finished baking and was turning my oven off!  

    And here are the pretty, flat ones! :)  My family actually loved these, so they were a huge hit even if they didn't turn out perfectly.  Even the ones I baked in the muffin tin set up a bit better after I left them in the pan to cool for about an hour.  

    I would recommend that you do not press the Hershey Kisses into the cookies immediately after baking.  The cookies were pretty hot and the Kisses melted quite a bit.  I had to let the cookies cool for hours before I could store them in a container because I needed to wait for the Hugs to turn solid again.  I would suggest waiting maybe 3-4 minutes after baking to add the Hugs or Kisses.  You want the cookie to still be warm, but not so hot that it turns the Kiss into a chocolate pudding.
    I would also suggest that you ALWAYS check your oven to be sure that it is indeed set on Bake and not Preheat. ;)

    Thank you, Jaime for the fun Christmas Cookie recipe! 

    When did you last commit a baking fail?  Were you able to salvage the results? :)